Clients will commonly have an assortment of boxes they use with predetermined dimensions and Box IDs. It is important to configure the client's Box Table to reflect that assortment. This article is a dive into how to create that Box Table for clients by utilizing ShipViaApp.
Having said that, another route to create the mentioned Box Table is through the ViaDUCT DB, but this article will explore the slightly more convenient option that allows for quicker addition/editing of boxes from that table; ShipViaApp.
You will need:
- The client to be set up within ViaDUCT https://viaductscripts.com/ (see https://shipsource.freshdesk.com/a/solutions/articles/9000272499 and https://shipsource.freshdesk.com/a/solutions/articles/9000272361 for guidance on Onboarding a client)
- Aux Data of RudirockUsername and RudirockPassword (set in the software ShipVia-Web-Prod if not P21, and ShipVia-Web-P21 if the client is using P21)
- Registry Editor App
- ShipViaApp
Steps:
1. Open Registry Editor
2. Navigate to DefClientId as pictured below.

3. Double-click DefClientId, this will open a prompt to change its value. Replace the existing value with the exact value set in the client's Aux Data titled "RudirockClientId". Click OK
4. Open ShipViaApp. Upon being prompted to log in, enter the credentials associated with the client's Aux Data "RudirockUsername" and "RudirockPassword"
5. Select "Setup" at the top right of the UI as pictured below:
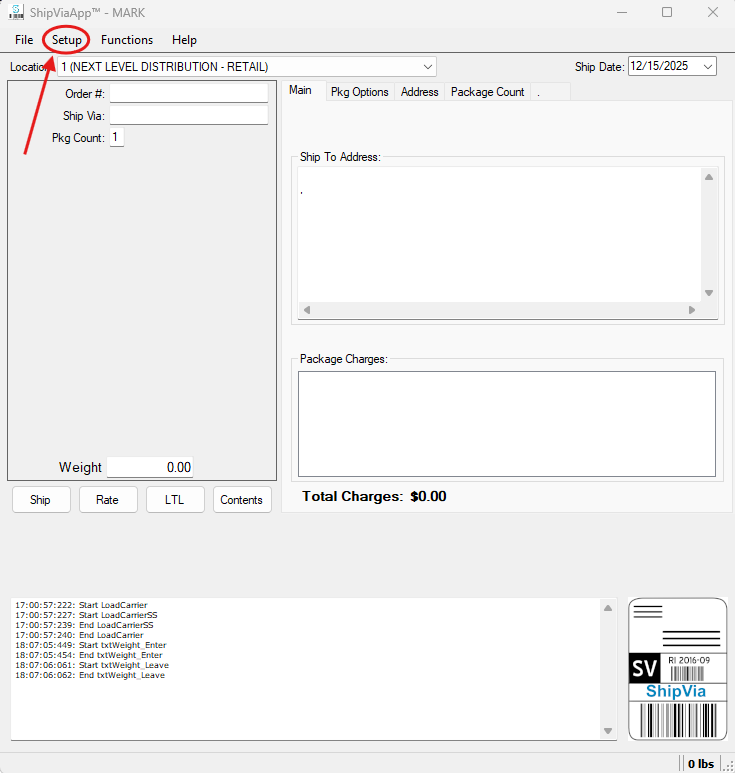
6. In the dropdown menu that will appear after selecting "Setup", select "Box Table". This will generate a popup box that will display options such as "Add", "Edit", "Delete", and "Exit"
7. Upon selecting "Add", another popup box will appear and will prompt you to fill in information on the Box ID and dimensions. This information is gathered from the client that you are setting the Box Table up for. After filling out this information on the first box in the client's assortment, click OK. You have now added one box to their Box Table.
8. Continuously add boxes until their Box Table is set to match the client's assortment of boxes exactly. To edit any boxes, simply select a box from the list, and click "Edit".
9. Confirm with the client that the Box Table is set up properly. Make any appropriate adjustments if needed.